I recently had to port my steam game to Mac so my friends could play it - and the process was kind of gruesome so I wanted to outline some of the things I did to document it for other people (and my future self) to have as a refence. I’ll just jump right into the steps I took:
Additional Note: My mac build still has some issues with library links in the app package, so please take this as a rough guideline rather than a full breakdown.
Environment setup
The first thing I had to do was actually get my Mac environment setup to be able to build the game. This meant getting CMake up and running, as well as all the libraries set up and ready to go. I used homebrew as a starting point, which worked perfectly well for the most part!
Getting CMake up and running was the easiest part - I just had to install it with the command brew install cmake. Then, installing the libraries I relied on was just as simple:
brew install sdl2
brew install sdl2_mixer
brew install glew
brew install freetype
Cmake file changes
This was probably the most frustrating part - I use vcpkg on windows so the differences in package manager by using brew was a pretty big headache. A lot of time was spent trying to figure out where libraries were actually located and how to pipe that into CMake, not to mention the fact that I’m not a mac user so I was 10 times slower just navigating the computer.
CMake project generation
On windows, I usually pass in the vcpkg cmake toolchain file to get my libraries properly linking, which obviously had to change for Mac. The argument I passed to CMake instead just added my homebrew path as a prefix so the makefiles could find the proper libraries, which looked something like this:
cmake --fresh -DCMAKE_PREFIX_PATH=/opt/homebrew ..
Executable target changes
The first change in the CMake file was getting CMake to recognize that it should be building the project as an application bundle - this was done by changing the actual target in CMake to be platform sensitive:
if (WIN32)
    add_executable(Mantra WIN32 main_echo.cpp app_echo.rc)
endif()
if (APPLE)
    set(MACOSX_BUNDLE TRUE)
    add_executable(Mantra MACOSX_BUNDLE main_echo.cpp)
endif()
set_target_properties(Mantra PROPERTIES OUTPUT_NAME "Danju")
Library linking
I had a lot of trouble figuring out how to get libraries to link properly, with freetype and SDL2_mixer being especially problematic. I’m not a CMake guru so I’m just gonna post the changes I had to make - without the knowledge of why I had to do things this way. If anyone knows better than me, feel free to correct any mistakes…
if (APPLE)
    find_package(Freetype REQUIRED)
    find_package(SDL2_mixer REQUIRED)
    find_library(OpenGL_LIBRARY OpenGL)
    target_link_libraries(Mantra ${OpenGL_LIBRARY})
    target_link_libraries(Mantra ${FREETYPE_LIBRARIES})
    # Not sure why I had to manually specify the include directories for freetype specifically?
    target_include_directories(Mantra PRIVATE /opt/homebrew/include/freetype2)
else()
    find_package(freetype CONFIG REQUIRED)
    find_package(sdl2-mixer CONFIG REQUIRED)
    target_link_libraries(Mantra Opengl32.lib)
    target_link_libraries(Mantra freetype)
endif()
target_link_libraries(Mantra SDL2::SDL2)
target_link_libraries(Mantra GLEW::GLEW)
if (APPLE)
    target_link_libraries(Mantra SDL2_mixer::SDL2_mixer)
    target_link_libraries(Mantra "${STEAMWORKS_SDK_DIR}/redistributable_bin/osx/libsteam_api.dylib")
else()
    target_link_libraries(Mantra SDL2::SDL2_mixer)
    target_link_libraries(Mantra "${STEAMWORKS_SDK_DIR}/redistributable_bin/win64/steam_api64.lib")
endif()
Note1: I have the steamworks SDK setup as a submodule in the project, if your steamworks SDK is setup differently then the steamworks part of the library might need to be setup differently as well…
Note2: to properly run the game after building, I had to also add this line which copies the assets from my source assets folder to the specified resource folder of the resulting app.
if (APPLE)
add_custom_command(TARGET Mantra POST_BUILD COMMAND ${CMAKE_COMMAND} -E copy_directory
    "${CMAKE_SOURCE_DIR}/assets"
    "$<TARGET_BUNDLE_CONTENT_DIR:Mantra>/Resources/assets")
endif()
Code changes
There are a few obvious code changes I needed to make the platform switch work. The biggest one is that I usually use the winmain entry point for my games, which obviously doesn’t exist on apple so I had to replace that with some ifdefs:
#ifdef BUILD_WINDOWS
#define WIN32_LEAN_AND_MEAN
#include <windows.h>
#endif

// ...

#ifdef BUILD_WINDOWS
    int WINAPI wWinMain(HINSTANCE hInstance, HINSTANCE hPrevInstance, PWSTR pCmdLine, int nCmdShow)
#endif
#ifdef BUILD_APPLE
    int main(int argc, char* argvp[])
#endif
{
    // Body here...
}
Rendering issues
Since I’m using OpenGL, I had no rendering or graphical issues for the most part after the build itself was running. The one major one I was running into was that my game was only rendering at a very small quadrant on the lower left corner of the screen. Thankfully, this took very little time to figure out as I had suspected it was something to do with the viewport size so it was easy to find the solution.
The issue boiled down to the retina display on the Mac, which means that the window size that I set is actually less than the amount of pixels I can render to. The fix was simple, and not platform specific so I didn’t have to wrap it in any platform definitions:
// Find the width/height of area that can actually be rendered to and use that instead
//  of the direct window width and height
int fWidth, fHeight;
SDL_GL_GetDrawableSize(mPlatformImpl->mWindow, &fWidth, &fHeight);
glViewport(0, 0, fWidth, fHeight);
Running the app
Steam platform integration aside, I was able to run the game properly on my Mac at this point. It took me a while to figure out how to actually run the app that was built so I figured I would include how I did that here as well - for some context, I am using an out of source build, which means I have a separate build folder that is used by CMake to handle all build stuff.
The app itself all got built into an application bundle (which for me was named Danju), and was found at the top level of the build folder (e.g. CMAKE_ROOT/build/Danju). What I did not realize was that you could show the contents of the package and inspect it to see if things got built correctly. Within that package, there are 2 key paths:
# The actual executable file that is run
Danju/Contents/MacOS/Danju
# The assets for the game get put in the Resources folder, which act as a "working directory" when running the app directly
Danju/Contents/Resources/assets
Note1: Since the steamworks library is a dynamic library, I also had to manually copy paste the libsteam_api.dylib file to where the executable is located
Note2: This directory structure worked for me when testing the game locally - however, I had to move the assets to the root when actually shipping the steam build for it to be properly recognized
Steam testing
At this point, I was able to fully run the game locally - so I then wanted to start testing by uploading to steam. The problem was that my game was already released, so I wasn’t sure how to handle testing a new platform while not impacting the existing release; Thanksfully, I found this handy page on the steamworks documentation that outlines the process well. I’ll explain in a bit more detail the exact steps I took in addition to following the steps on the documentation.
Creating a new Depot and Build
A Depot is essentially a distinct collection of files, so I had to create a new one for the Mac build. This depot would be where I actual sent my files to via SteamPipe. The settins for this is found in App Admin -> SteamPipe -> Depots
Then, I created a new Build with a password so that only I could test it. The settins for this is found in App Admin -> SteamPipe -> Builds

Uploading the build
The process for uploading the build does not change much for separate platforms. I used the SteamPipeGUI that is included with the steamworks SDK to handle uploading my builds - I just had to remember to change the Depot ID to point to the newly created Mac depot.

Note: Remember to click Generate VDFs after you add the new depot ID to upload to!
Setting the build to live
After the build has been uploaded, it needs to be set to live on steamworks for it to actually reach an end user. This is done by going back to the builds page (App Admin -> SteamPipe -> Builds) and finding the uploaded build to set live on branch - click the corresponding branch and click the Preview Change button to follow the steps and set the build to live!

Launch options
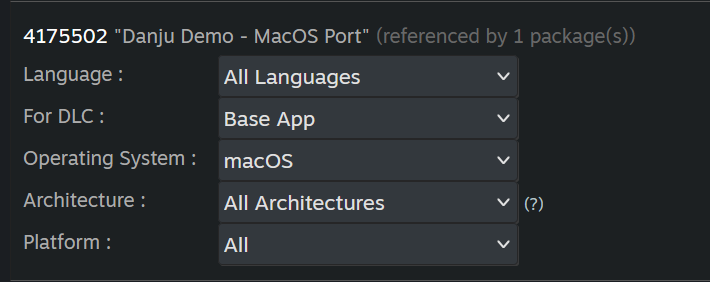
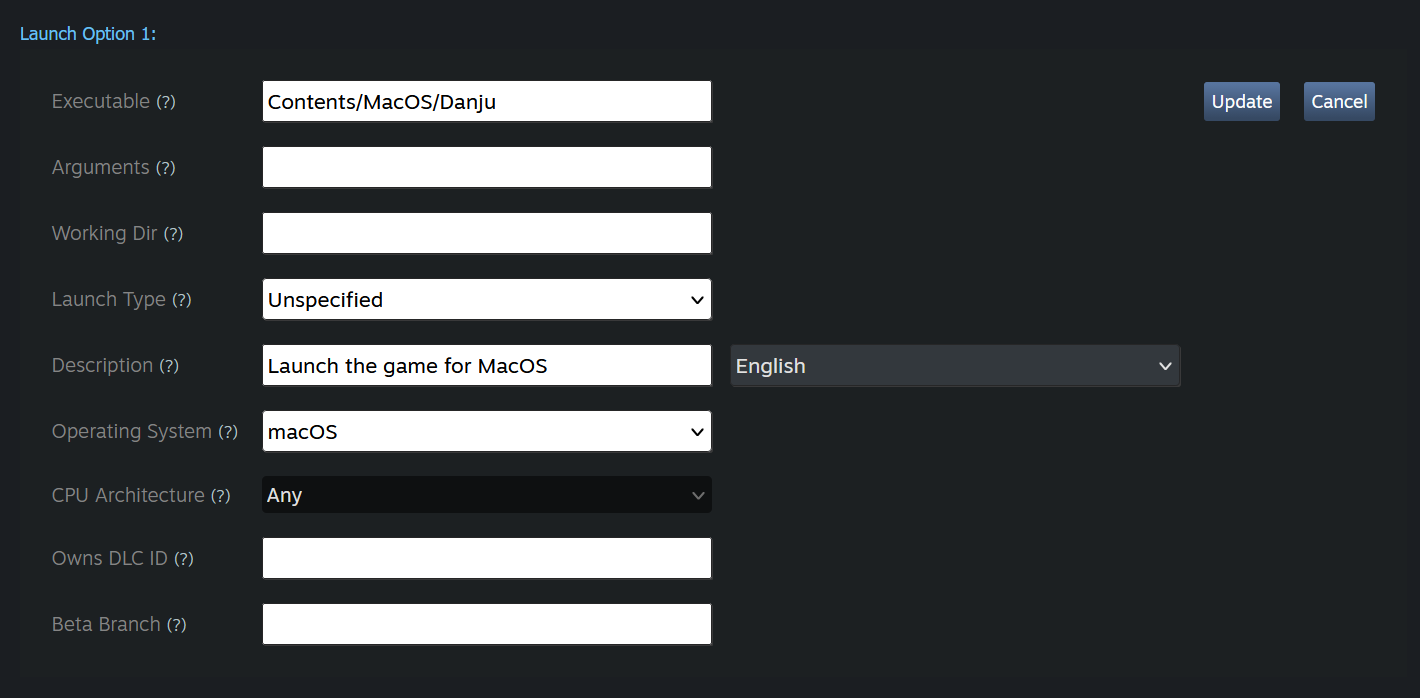
One last important step is to add a new launch option for Mac so that it can properly find the right executable to launch. The documentation I found said that there are some default ways that steam handles this, but they didn’t quite work for me so I had to manually specify the entire path from the root to the executable. These settings are found under App Admin -> Installation -> General Installation.
Note: I’ve already mentioned before, but I had to move the assets manually to the root folder to make it work. As such, the folder structure that I shipped with looked like this:
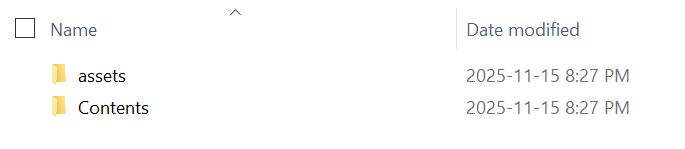
Running the game through Steam
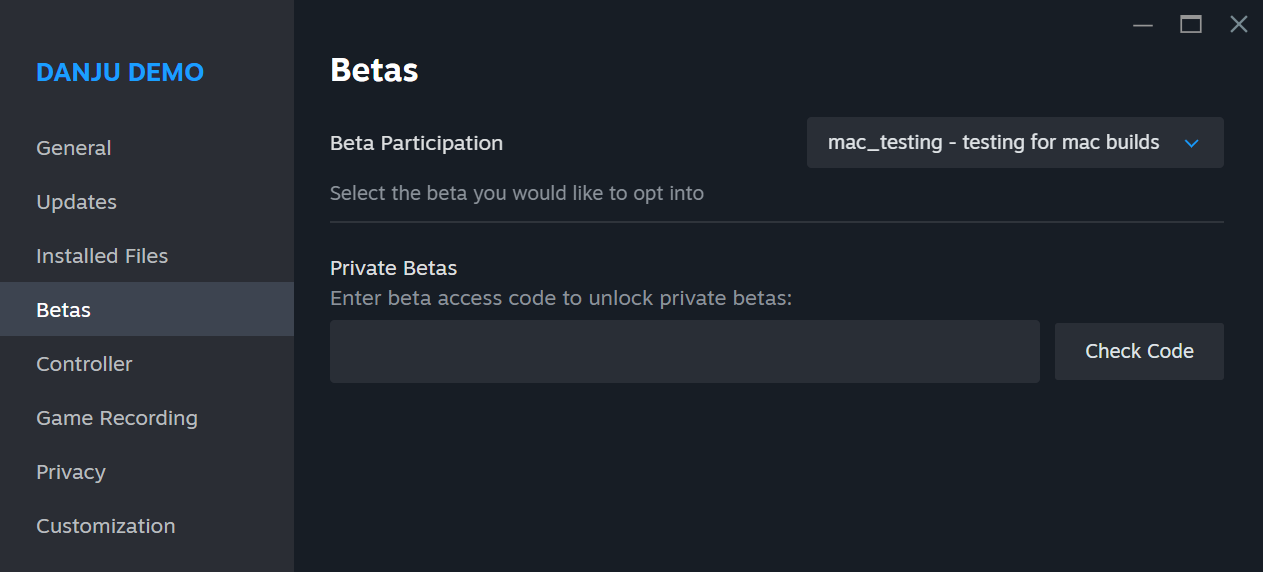
The last bit to tie it all together is to actually launch the game on the newly created branch. First, navigate to the game you are porting and find Properties.. -> Betas. Input the password for the branch into the field under Private Betas and it should show a button to enable Beta testing for your new platform branch.

Your game should now specify the version that is being tested on the steam library page! You’re now free to test whatever you want through an uploaded steam build through the actual platform, and hopefully there aren’t any issues!

Author’s note
Please consider withlisting my game on steam or trying out the free demo! It’s a pachinko-like game with progression, upgrades, and many fun quirky levels!
https://store.steampowered.com/app/4161580/Danju/
https://store.steampowered.com/app/4175500/Danju_Demo/